Alright, so you've got a shed, and you're tired of it being either an oven in July or a freezer in January. You want to insulate it, and that's a smart move. Whether you're turning it into a workshop, a home office, or just need a place to keep your tools from rusting, proper insulation makes a world of difference. But here's the thing: I've seen a lot of homeowners around Philly make some pretty common blunders when they're planning or hiring for this kind of project. Let's talk about what to watch out for so you don't end up regretting your choices.
Mistake #1: Not Thinking About the Foundation (or Lack Thereof)
This is a big one, especially with those pre-fab sheds. A lot of sheds are just sitting on concrete blocks or a gravel base. You might insulate the walls and roof perfectly, but if you've got a cold, damp floor, you're fighting a losing battle. Heat rises, sure, but cold also radiates. If your shed floor is just plywood over open air or directly on cold concrete, you're going to feel it. I've seen sheds in South Philly, especially those tucked into tight backyards, where the ground stays damp for days after a good rain. That moisture and cold will creep right up.
You need to consider insulating the floor. That might mean adding rigid foam insulation under the subfloor if you're building new, or even insulating the joist bays from underneath if the shed is elevated. If it's on a slab, you're a bit more limited, but you can still add an insulated subfloor or at least a good vapor barrier and some heavy-duty mats. Don't skip this step; it's foundational (pun intended).
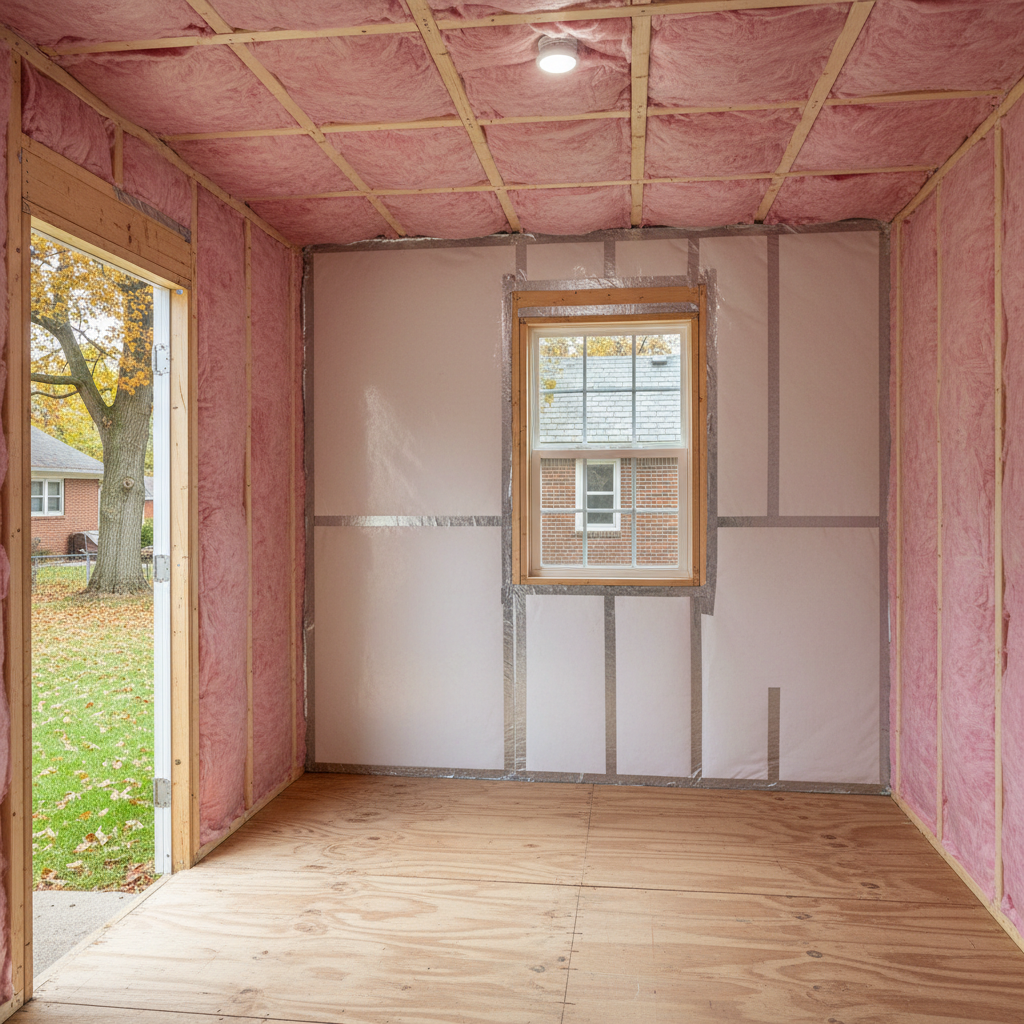
Mistake #2: Going Cheap on the Vapor Barrier (or Forgetting it Entirely)
Philly weather is no joke. We get humid summers and cold, damp winters. Moisture is your enemy when it comes to insulation. If you don't have a proper vapor barrier, you're inviting condensation, mold, and rot into your shed's walls and ceiling. I've seen sheds where folks just stapled up some fiberglass batts and called it a day. A few years later, they've got a mildew problem and the insulation is soaked and useless.
A vapor barrier goes on the warm side of the insulation (usually the inside, facing the heated space). It prevents moisture from the air inside your shed from migrating into the wall cavity and condensing. For a shed, a simple 6-mil polyethylene sheet can work wonders. Make sure it's continuous and sealed properly at seams and penetrations. It's a small cost upfront that saves you a huge headache down the line.
Mistake #3: Ignoring Ventilation
This ties into the moisture issue. You insulate, you seal it up tight, and then you forget to let the air move. Without proper ventilation, especially in the attic space of your shed, you're just trapping heat and moisture. In the summer, that attic space can hit scorching temperatures, radiating heat down into your insulated shed. In the winter, warm, moist air from inside can still find its way into the attic, condense, and cause problems.
You need soffit and ridge vents, or at least some well-placed gable vents, to allow for airflow. This helps regulate temperature and, critically, removes moisture. It's a balance: you want to seal the conditioned space, but you need to vent the unconditioned spaces. Don't just slap insulation everywhere without thinking about how air will circulate.
Mistake #4: Not Matching Insulation Type to Shed Use
Not all insulation is created equal, and not every shed needs the same R-value or type. Are you storing gardening tools that just need to stay above freezing? Or are you running a woodworking shop out there year-round? If it's the latter, you're going to need a much higher R-value and a more robust solution.
I've seen people use standard fiberglass batts in a shed that's going to be exposed to a lot of temperature swings and potential moisture. Fiberglass is okay, but it's not the best for sheds. It can slump, get wet, and lose its R-value. For sheds, I often recommend something like rigid foam boards or, for the best performance, spray foam insulation. Spray foam, like what we do at Spray Foam Pros of Philadelphia, provides an excellent air seal and high R-value, plus it's resistant to moisture and pests. It's a bigger investment, but if you're serious about using that shed, it pays off in comfort and energy savings.
Mistake #5: Forgetting About Air Sealing
This is probably the most common and most overlooked mistake. You can pack your walls full of the best insulation money can buy, but if you've got gaps and cracks around windows, doors, and where walls meet the floor or ceiling, you're still going to have drafts and heat loss. Insulation slows heat transfer; air sealing stops air movement.
Before you even think about putting up insulation, walk around your shed with a critical eye. Look for any gaps. Use caulk for smaller cracks and expanding foam for larger ones. Pay close attention to the bottom plate where the walls meet the floor, and around any openings. An airtight shed is a comfortable and efficient shed. Don't let your expensive insulation job be undermined by a few unsealed gaps.
Doing your homework and avoiding these common mistakes will save you a lot of grief and money in the long run. A well-insulated shed isn't just a luxury; it's a smart investment in your property and your comfort.